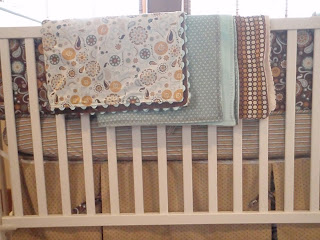
I made three blankets in coordinating fabrics to match the stylish nursery crib set that I featured a week ago. These blankets were very simple and fairly quick to put together. I think they would make a fantastic baby shower gift! I did follow a tutorial that I will post at the end, however I did a few things different here and there that I will point out.
You can see in the picture that none of the coordinating fabrics are the same exact fabrics that I used on the stylish nursery crib set. However, they are in the same "color story" as fabric manufacturers like to call them. This ties in more of the same colors and same patterns, but gives a more individualized flare.
All the blankets are backed with a type of fabric minky that is super soft and perfect for babies. There are literally tons of minky colors and patterns to choose. Notice that each blanket has a different edge to it.
This blanket has the ric-rac sewn between the two pieces of fabric. I chose to use a 1/4 inch seam with a matching thread to define a border along the cotton fabric, instead of doing a "top stitch or edge stitch". The matching thread is gold and blends, so that it doesn't distract from the beautiful pattern. A chocolate brown thread would have made a more definite edge by drawing your attention to the seam instead of the pattern. I am learning that color choice in thread can draw your eye to what you want to be seen or hide what you don't want to be seen. In my case, as a novice seamstress, this technique helps to hide my mistakes.
This blue blanket below has a simple edge stitch in white that you have to strain to see and a decorative chocolate brown stitch that really draws your eye on the minky side. It is simple, but unique.
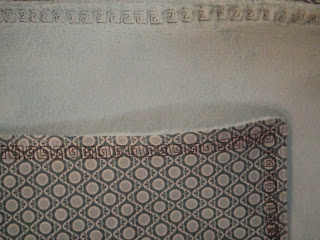
Lastly, this chocolate brown blanket has a gorgeous embossed minky and a busy cotton dot. This pattern called for adding a simple solid binding strip along the edge, but I was short on time and decided to do a simple edge stitch with dark thread to blend into the dot fabric. There is so much detail in these fabrics that the blanket still looks finished without looking plain. You can imagine the blue blanket above without the decorative stitch might look a bit plain. Fabric choice is definitely the key when deciding on finishing techniques.
These blankets are all simple sewing and very forgiving projects for beginners, with a potential to look like a seasoned seamstress put them together! You can find the tutorials here. One last note, the patterns call for one yard pieces of fabric, but I made all of mine 36"x42". My first baby had over 20 blankets made for her, but she outgrew all but three by the time she turned one. So I measured those blankets and found that they were merely an extra 6" longer on one side and fit perfectly in her toddler bed. Since I plan to also use the crib bedding for a toddler bed down the road, these blankets will not get outgrown by that time. More bang for the buck and all the effort if you ask me!!
Have a great weekend and tune in tomorrow for the first Sunday Sneak-Peek of the week to come!
Heather


No comments:
Post a Comment