Friday, February 10, 2012

FEATURE FRIDAY--GLITTER GIRL DESIGNS

FEATURE FRIDAY PRESENTS


Glitter Girl Designs

 GLITTER GIRL DESIGNS
 BY WHITNEY SITTON
HERMISTON, OR 97838
(541) 379-1278


Whitney just recently made these pink sock monkey sugar cookies for my little girl's 2nd Birthday. I actually get to pick them up today! I have had her cookies before and they are TO DIE FOR!! I assure you that you have never had cookies like these! She is just so talented and creative that I had to feature her on my blog. Give her a call, email her, or find her on facebook under GLITTER GIRL DESIGNS for an easy way to make a BIG impression at your next event!


Thursday, February 9, 2012

THOUGHFUL THURSDAY--REPURPOSING

Hello Everyone!

It's a short thought today. I was hoping to get some feedback on how a person might re-purpose thread spools? I have been doing a lot of sewing lately and have stockpiled some spools with the idea that they could be used for something. I just haven't figured it out yet! So please leave your ideas on my blog!

I do have some re-purposing tutorials coming up, so start saving your egg cartons, square milk jugs (from Costco if you buy those), dryer lint, cereal boxes, cardboard boxes in general, clorox bleach wipes containers, and oatmeal containers!

Heather

Wednesday, February 8, 2012

WHATEVER WEDNESDAY--APOTHECARY JAR TUTORIAL

Hello!

My little girl's 2nd Birthday is coming up this Saturday and since I am due to deliver baby #2 anytime, I decided to make her birthday a bit easier on myself and to do a bar of candy and goodies instead of baking. When I saw this apothecary jar tutorial, I immediately thought of how these would be fabulous to use for candies at this party AND the four baby showers that i have going on this spring.

So to start out with, I purchased all my supplies at Hobby Lobby. The round bases were $1 each, the candle sticks were $1.50 each, and the finials were $1.50 each. All three items were found in the unfinished wood section. The jars were in the glass container section and were $4.95 each.  Had I not wanted to use these right away, I would have waited until the unfinished wood section went on sale as it frequently does.


I am all about simplifying, so I used spray paint. I wanted a light colored finish with some sort of distressed look, so I tried some crackle on top. I wouldn't say it turned out exactly how I pictured, but they still turned out fabulous!


After painting, simply glue the base to the candlestick, and the candlestick to the bottom of the jar. Use Gorilla Super glue for the best results. It is the fastest drying and the pieces will not slide.

This picture below is the best I could get of the crackle. The two colors were too similar to really show up. Next time I will do a darker base color with lighter crackle for more contrast.


Next, hot glue some natural jute around the edge of the jar lid. Then use Gorilla super glue to attach the finial to the center of the lid.


Hobby Lobby was short a couple finials, so I still have to finish two. However, the center one is the finished project! I love how they turned out, now can't you picture some colorful candies in each?!


I may even make a couple more with different sized jars to offset the height of each and then use them in my bathroom by my jacuzzi tub. Maybe fill them with homemade bath salts, bath fizzies, and soap balls. My next ones will definitely be the pottery barn black, with sanded and stained edges for decor somewhere else in my house! Maybe mix it up with some mismatching candlesticks and/or finials.


If you would like the tutorial that I followed (sort of), then click here. I love the tutorials from this source and will definitely be doing more or at least getting ideas from this in the future!

Thanks and hope you enjoyed this one as much as I did!

Heather

Tuesday, February 7, 2012

TODDLER TUESDAY--DOUBLE FLANNEL RECEIVING BLANKETS

Good Morning!

I am gearing up to go into labor any day now with my second baby, who is a boy. This time around, I decided to make my own receiving blankets. I used my receiving blankets like crazy with my first baby, and since they are so darn easy to put together, I decided to make my own! Plus, I just love fabric and there happen to be a 50% off flannel sale at Joann Fabrics, so it was an easy argument!

First things first, the receiving blankets that you get in packages are usually just a square yard piece of fabric with a pattern on only one side. My mother-in-law made me a double flannel receiving blanket, which was so much more universal, plus fashionable on both sides. I loved this blanket to swaddle my February baby in warmth, then also used it to keep the baby warm under air conditioning vents in the car during the hot summer months. Seems ironic, but that little baby's skin would get so chilly in the air conditioned car!

So to start out with, you will need two pieces of flannel cut to the same size. I used the width of the fabric (which was usually 42" minus the selvage) by 1 yard. U can pick the same pattern and double up OR pick coordinating patterns and colors like I did.


 Once you have cut the two flannel pieces to the size you want, pin them wrong sides together and stitch a 1/4 from the edge all around the blanket.


These blankets will probably get washed frequently, so you will want to be sure to choose a stitch pattern that will withstand lots of wearing and washing. My sewing machine is a very basic model that only gives me the option of zigzag. I set it to the widest and closest zig zag
(probably not the appropriate lingo but hopefully you can get the idea) that I could. Your machine will put down a lot of thread, but your blankets will definitely have a better chance of staying together!


Tada! I whipped these babies out in an hour with a toddler in tow! Hope you enjoy this simple and fast sewing tutorial!


Heather

Monday, February 6, 2012

MAKEOVER MONDAYS--PART 2 OFFICE/CRAFT ROOM MAKEOVER

Hello!

You may remember Part 1 of the office/craft room makeover that I posted about a week ago, if not you can find it here. Part 2 of the office/craft room makeover is the addition of a new functional piece of furniture to organize all my craft supplies. The before pictures below show one wall with an old entertainment center filled with all sorts of crafting and office supplies with no particular organization.


The window side of the room with the treadmill, which obviously couldn't be used without moving a bunch of things off of it.


This picture is really just to show you where the new piece of furniture is going to end up.


Here is the new piece of furniture I found at the Junk Barn Girls this last summer. This piece is solid built and has lots of character! It had already been refinished in a black pottery barn style that I love! I got it for the grand total of $100--WHAT A STEAL!


The inside is very cool and unique for organizing. Reminds me of an old post office sorting box.


Here it sits in its place.


The bags on top were purchased from Thirty One. My theme in this room is black and white with the green accents. These bags are great for storing fabric and projects. Also makes it easy to throw a project in one to take on the road. The bag on the right has all sorts of great utility pockets for my sewing supplies and easily fits my sewing machine when I need to pack it up off my desk.


When you open the doors, this is what you see. It is still a bit like organized chaos in my mind, but when I finish Part 3 of this entire makeover, we will revisit organizing some of these cubicles.


This is the inside and bottom two drawers. Again, lots of chaos, just wanted to show you that lots got moved into there. This will get organized a bit better also with some great ideas and techniques that I plan to show you in Part 3.


You can see from the pictures below that a lot of the stuff from that entertainment center got moved and organized into that one piece of furniture. It was a major improvement!


Part 3 of the makeover will cover how I plan to re-purpose this old entertainment center and further use it to organized this room. Hopefully you won't even recognize it! Cannot wait to share it with you! Stay tuned for part 3, unfortunately it will be closer to march before I can get this project finished.


Heather


Sunday, February 5, 2012

SUNDAY SNEAK-PEEK

Hello everyone!

Here is the SUNDAY SNEAK-PEEK at the week ahead on Sew Mad Crafty~


FEB 6,  MAKEOVER MONDAY--PART 2 OFFICE/CRAFT ROOM MAKEOVER

FEB 7, TODDLER TUESDAY--DOUBLE FLANNEL RECEIVING BLANKETS TUTORIAL

FEB 8, WHATEVER WEDNESDAY--APOTHECARY JARS TUTORIAL

FEB 9,  THOUGHTS ON THURSDAYS--RE-PURPOSING

FEB 10,  FEATURE FRIDAY--THE BEST SUGAR COOKIES AROUND

FEB 11, SEW SATURDAY-- PAYTON'S SOCK MONKEY TUTORIAL

In addition to the Sunday Sneak-peeks, I will be adding on a linking party every Sunday for everyone to share their projects and tutorials. My goal is to get some giveaway's organized to award the most liked or most popular post. So start taking pictures of your projects and stay tuned for a tutorial on how to join the linking parties and win some goodies!


Hope you had a great Superbowl Sunday!

Heather

Saturday, February 4, 2012

SEW SATURDAY- TRIO OF CRIB BLANKETS

Hello!

 I made three blankets in coordinating fabrics to match the stylish nursery crib set that I featured a week ago.  These blankets were very simple and fairly quick to put together. I think they would make a fantastic baby shower gift! I did follow a tutorial that I will post at the end, however I did a few things different here and there that I will point out. 

You can see in the picture that none of the coordinating fabrics are the same exact fabrics that I used on the stylish nursery crib set. However, they are in the same "color story" as fabric manufacturers like to call them. This ties in more of the same colors and same patterns, but gives a more individualized flare.


All the blankets are backed with a type of fabric minky that is super soft and perfect for babies. There are literally tons of minky colors and patterns to choose. Notice that each blanket has a different edge to it.


This blanket has the ric-rac sewn between the two pieces of fabric. I chose to use a 1/4 inch seam with a matching thread to define a border along the cotton fabric, instead of doing a "top stitch or edge stitch".  The matching thread is gold and blends, so that it doesn't distract from the beautiful pattern. A chocolate brown thread would have made a more definite edge by drawing your attention to the seam instead of the pattern. I am learning that color choice in thread can draw your eye to what you want to be seen or hide what you don't want to be seen. In my case, as a novice seamstress, this technique helps to hide my mistakes.


This blue blanket below has a simple edge stitch in white that you have to strain to see and a decorative chocolate brown stitch that really draws your eye on the minky side. It is simple, but unique.


Lastly, this chocolate brown blanket has a gorgeous embossed minky and a busy cotton dot. This pattern called for adding a simple solid binding strip along the edge, but I was short on time and decided to do a simple edge stitch with dark thread to blend into the dot fabric. There is so much detail in these fabrics that the blanket still looks finished without looking plain. You can imagine the blue blanket above without the decorative stitch might look a bit plain. Fabric choice is definitely the key when deciding on finishing techniques.


These blankets are all simple sewing and very forgiving projects for beginners, with a potential to look like a seasoned seamstress put them together!  You can find the tutorials here.  One last note, the patterns call for one yard pieces of fabric, but I made all of mine 36"x42".  My first baby had over 20 blankets made for her, but she outgrew all but three by the time she turned one. So I measured those blankets and found that they were merely an extra 6" longer on one side and fit perfectly in her toddler bed.  Since I plan to also use the crib bedding for a toddler bed down the road, these blankets will not get outgrown by that time. More bang for the buck and all the effort if you ask me!!


Have a great weekend and tune in tomorrow for the first Sunday Sneak-Peek of the week to come!


Heather

Friday, February 3, 2012

FEATURE FRIDAY--THE STYLING ARENA

Hello Everyone! Today's Feature Friday is:


THE STYLING ARENA & BOUTIQUE
175 West Hermiston Avenue
Hermiston, OR 97838
541-567-6242


These gals are a fantastic bunch of women! I have had my hair done by three of them and have never been disappointed! It is a fabulous atmosphere with lots of fun goodies in the boutique.Visit their website to see the newest products and treasures in the boutique and be sure to "Like" them on Facebook as I know there are several discounts and sales offered if you stay tuned to their posts!

Call to check out their current Valentine's Specials and be sure to mention that you saw this on SewMadCrafty!

Have a great weekend!

Heather


Thursday, February 2, 2012

THOUGHTS ON THURSDAY--FEEDBACK ON MY BLOG

Good morning everyone!!


Starting a blog seemed like a daunting task at first because I didn't know where to start. After linking up with a several of my favorite fellow bloggers and getting lots of help from them, I think I am starting to get the hang of how to set up my pages and posts. However, I need feedback from viewers! So please leave a quick comment on how my blog looks, what kind of content you like or would like to see more of, if you want more pictures of the steps in the tutorials, if you think I should offer prize giveaways for DIY entries for example, maybe a Sunday sneak-peek of the upcoming weeks schedule of  posts, or any other things you would see relevant to help make my blog more appealing to you and others.

Thanks so much to those of you who have contacted me through Facebook and shared what you have thought about my blog so far. It is MUCH appreciated!

Have a great day!

Heather

Wednesday, February 1, 2012

WHATEVER WEDNESDAY--CORD ORGANIZATION

This was a handy tip that I saw somewhere online and have been saving up these little bread bag clips for a few weeks now. There is nothing worse than having a ton of cords all plugging into the same area and no way to tell which cord goes to what device. Simply collect these little tabs that come on bread bags and several other types of plastic food bags, spray paint a solid color to make them look more uniform, then label using a ballpoint gel pen or permanent marker.


I also incorporate a few twisty ties, usually found in sandwich baggies or garbage bags, to bundle the extra cord lengths for an added organization measure. I like to keep the extras in a baggie located in my desk so that they are handy when I am plugging in or unplugging different devices. However, I also use these to organize the cords near my bathroom vanity, and behind my entertainment center.

Such simple ideas can make life so much easier sometimes! What are some organization methods that you use?


Heather

Tuesday, January 31, 2012

TODDLER TUESDAY- NAME BLOCKS


Hello! These name blocks were one of my very first attempts to be crafty, but they did turn out to be so cute!


I purchased the pre-cut, beveled edge blocks and the green with pink polka dot ribbon at Craft Warehouse.  Drilled two holes at the top of each block (to run the ribbon through later for hanging).  Then I double coated all the blocks with a pink Folk Art craft paint using a foam pad paint brush, both purchased from Walmart.  I stuck on vinyl lettering, a decorative flower and butterfly that I had cut with my Cricut machine (this part could easily be replaced by using a stencil with spray paint for those of you who don't own a Cricut). Lastly, I cut pieces of ribbon and laced through the holes, tying knots to make a loop, then hung them from a nail. Very simply done!

Heather

Monday, January 30, 2012

MAKEOVER MONDAY--MY OFFICE/CRAFT ROOM MAKE-OVER PART 1

Good morning! This is PART 1 of my office makeover- the organization of my desk area.  My office was horribly cluttered and unorganized, especially at my desk.  So my goal was to add some features for organization and to give it a cleaner look with a fresh color. Here is the BEFORE pictures of the desk wall/area.


The picture below was a really cute arrangement of my daughters pictures from birth to present.


However, my goal was to get some organization on my wall that would clear up the cluttered desk.


This is the AFTER.


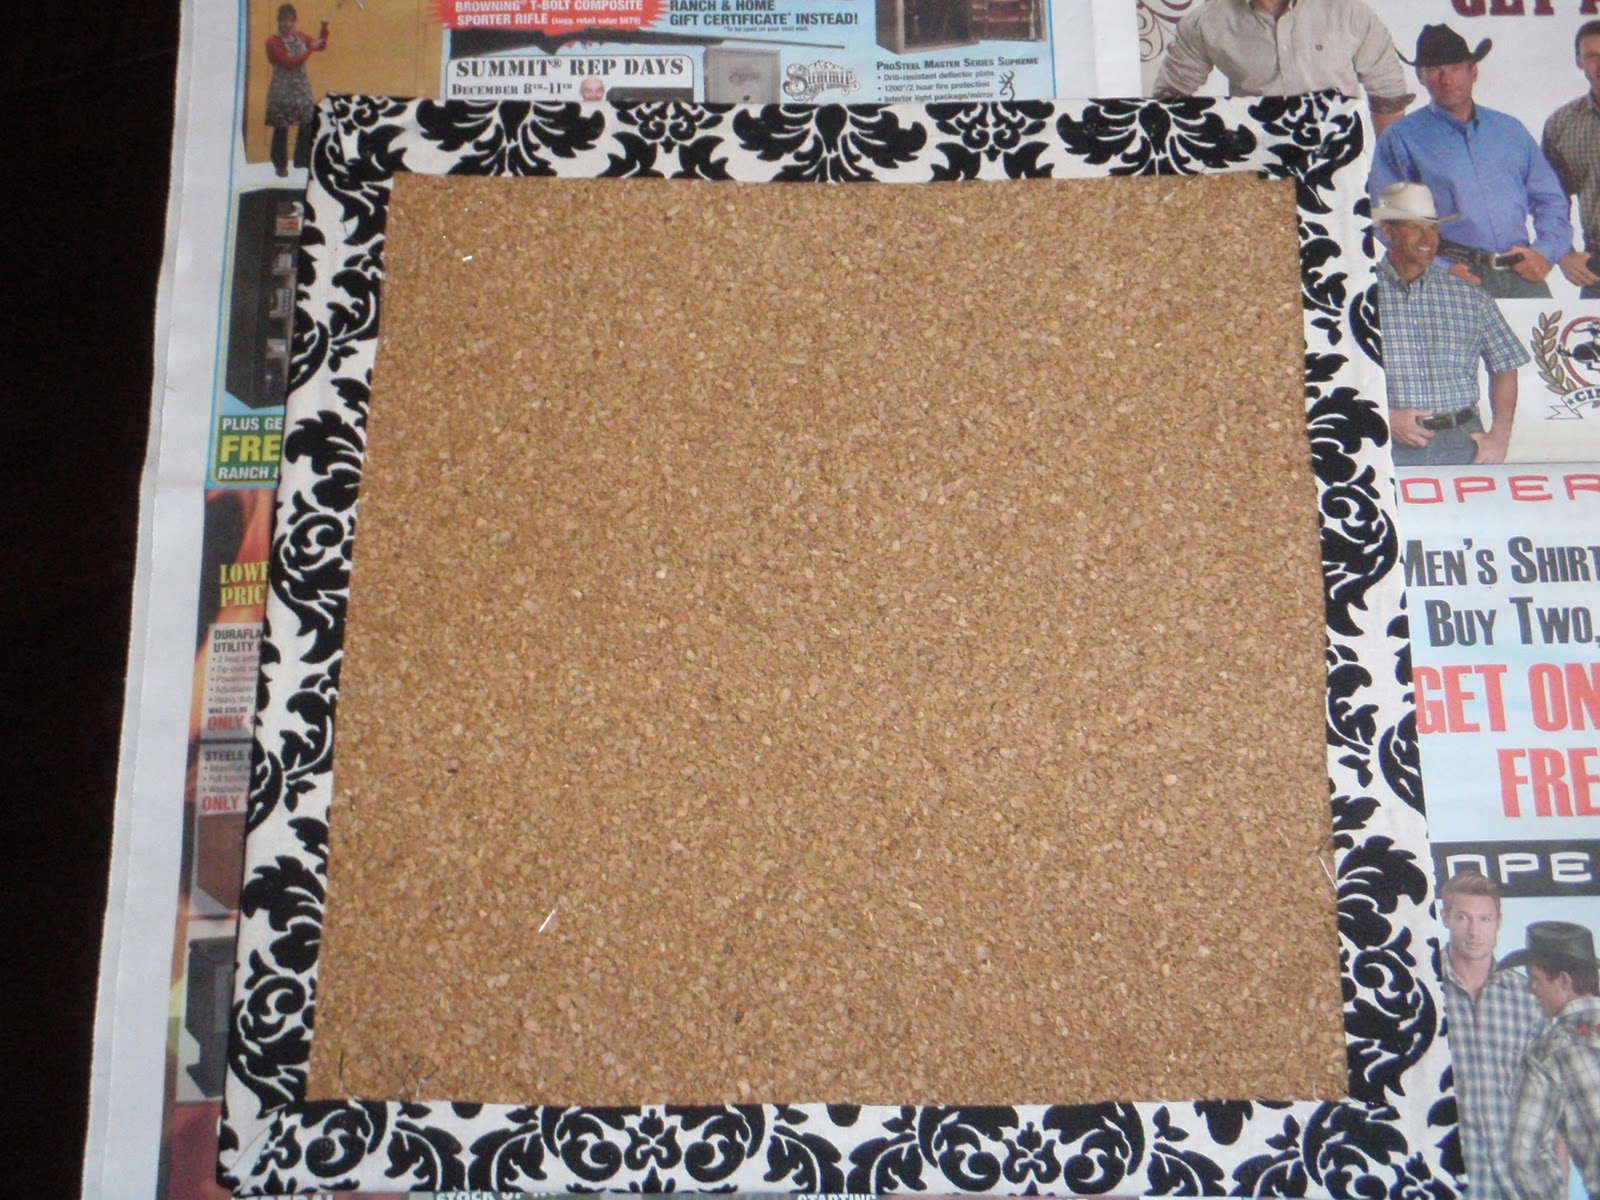
These three blocks are cork board covered with cotton fabric, to be used for pinning up important notes, coupons, etc.


I got a pack of four 12" x 12" at walmart. Cut the fabric 1 inch larger than the perimeter. Folded over the edge and hot glued down to the board.


I made sure to tuck the corners, like you would on a present, to make the corners nice and sharp.  Then add whatever ribbon or embellishments you would like, attached with hot glue in the same manner.


The old shutters were something I had sitting around. I just added a fresh coat of paint and nailed to the wall to be used as a wall file. I would have to encourage spray paint on these, as the traditional paint was hard to get between the slates and to keep from dripping. 


This door was picked up at the Junk Barn Girls first showing this last summer. I picked it up unfinished for $20. Painted on the color I wanted, plus some chalk board paint from home depot. I planned to use it for my project list, but it is currently my daughters favorite thing to decorate with her colored chalks.


This frame I use with clothes pins to hang just about anything. I just love the chicken wire!


I got the frame on a black Friday special two years ago from walmart. I just simply painted it flat black and stapled on a piece of chicken wire. Then I painted clothes pins to use for hanging. Turned out super cute!


I used another of the same kind of frame to make a magnet board (not shown in the office yet). Again, just painted it flat black, cut a piece of roofing metal from home depot to size, and hung it on the wall. Quite possibly a DIY magnet tutorial in the near future!


That's all for now! Stay tuned for Part 2 of this makeover. I will post it in about a month, as there are a few things I have left to do that must wait until after I have this baby! It will definitely be the most exciting part of the makeover yet! I can't wait to share it!! :)


Heather


Saturday, January 28, 2012

MY TOP 5 CLEANING TIPS

Here are just a few cleaning tips that may save you money, time, and elbow grease!


1.  The Mr. Clean Magic Eraser is your friend. It will cut your cleaning time in half for bathtubs, sinks, counter tops, and dirty walls. MONEY SAVING TIP--BUY MELAMINE FOAM SHEETS IN THE INSULATION SECTION OF YOUR NEAREST HOME IMPROVEMENT STORE--ITS THE SAME THING AT A FRACTION OF THE PRICE!!


2.  Vinegar and water is a great deodorizer for a musty bathroom. Spray your shower down as you're getting out. It really absorbs the odors, and the smell of vinegar goes away in an hour.


3.  Clean your microwave oven by microwaving a cup of water with some baking soda in it until it's boiling. That eliminates odors and makes it super easy to wipe away all that stuck-on stuff.


4.  To eliminate that ring in your toilet, drop in a bubbling denture tablet, and leave it for at least 30 minutes or overnight. The stain will come off with just a few swishes of the brush. BIG ELBOW GREASE TIP- USE SHEET ROCK SAND PAPER THAT LOOKS LIKE A BLACK MESH FROM HOME DEPOT TO GET THE RINGS AND HARD WATER OFF YOUR TOILET.


5.  BIGGEST MONEY SAVING TIP-- Use a 50/50 mix of peroxide and white vinegar in your carpet shampooer instead of the expensive carpet cleaning detergents. Your carpets will come cleaner and smell fresher just like a professional did them!


Heather

Friday, January 27, 2012

DIY BROWN SUGAR AND VANILLA BODY SCRUB

For those of you that get the horrible winter skin, eczema, or just like to pamper yourself, this is a fantastic and easy recipe for your own body scrub! I use this scrub at least every other day, if not EVERY day. My skin is so soft and the best part is that it keeps the eczema and winter dry, itchy skin away!


What you need:

INGREDIENTS-

2 cups brown sugar
1 cup white sugar
1 cup vegetable oil
4 tsp vanilla extract (can substitute with essential oils for a different fragrance)


SUPPLIES-

Mixing Bowl
Mixing Utensil
Containers store the scrub (I used 2 pint jars)


INSTRUCTIONS-

Combine both sugars together until evenly blended. Add oil and vanilla, mix until evenly distributed. Pour contents into a sealable container.


USE-

Scoop product and scrub onto skin. Can be used daily in your shower or when u wash your hands. I use on my whole body in the shower and each container lasts me about 1-2wks.

ENJOY!!

Heather

Thursday, January 26, 2012

THOUGHTS ON THURSDAY- MY REVIEW OF I-ROBOT ROOMBA

When I first heard of the little robot that cruises around your house vacuuming and sweeping all the floors, I immediately thought how nice that would be, but that it was not practical. Well, with the new baby coming and a little anxiety about how I am going to keep my OCD cleanliness standards met with double mommy duty, I broke down and bought one at Costco on Monday. I can tell you that I did choke a little about how much I paid, even though it was the cheapest of all the models, but I am not sorry that I bought one after only 3 days!


I purchased the I-Robot Roomba Pet Series 550. This little robot can be scheduled and programmed to clean up to 4 rooms at any time of day, which generally covers your high traffic areas. Additional rooms require you to set the robot in the room, push the "clean" button, and then walk away. The machine will turn itself off when the room has been completed. The machine also comes with a docking station, so that it may dock and recharge itself when the batteries are low, then return to cleaning or remain docked until you want to use it again. My husband and I were both a bit skeptical about the power of the suction on the vacuum, but after the machine cleaned a room that had just been vacuumed with our central vac, we were convinced that it really does a good job. The filter and dust pan were filled with a lot of very small dust particles, pet hair that was not visible to my eyes, and heavier metal objects like coins and screws that may have been under edges that a normal vacuum cannot reach.  The robot is very "smart". It slows down before  bumping into perimeter surfaces or furniture, it can sense stair ledges, changes from vacuum to sweep mode on its own, spends more time where it detects higher concentrations of dirt, and is equipped with several features that allow it to escape or avoid getting stuck on rugs, cords, etc.


After testing this product the last few days, I am convinced that it was well worth the money ($280). I pay a housekeeper to come into my home every two weeks to do a few hours of deep cleaning. The housekeeper spends at least two hours a month on my floors, costing $30 per month. At that rate, the robot is still $80 cheaper per year and I can have the clean floors every few days verses every two weeks at the most. The robot also comes with a one year warranty.


I would recommend this to most households, especially those with pets and children. Even though I am a stay-at-home mommy, my days are busy and filled with chores. This handy robot has taken an estimated 4-6 hours per week of cleaning time off my plate. I now have extra time to tackle a hobby project or to play with my little one. If I continue to enjoy this product over the next few months, I will definitely consider spending the money for an I-Robot Scooba, which is the equivalent robot that mops.

I hope this review spiked your interest and that you check it out! Have a great day!

Heather